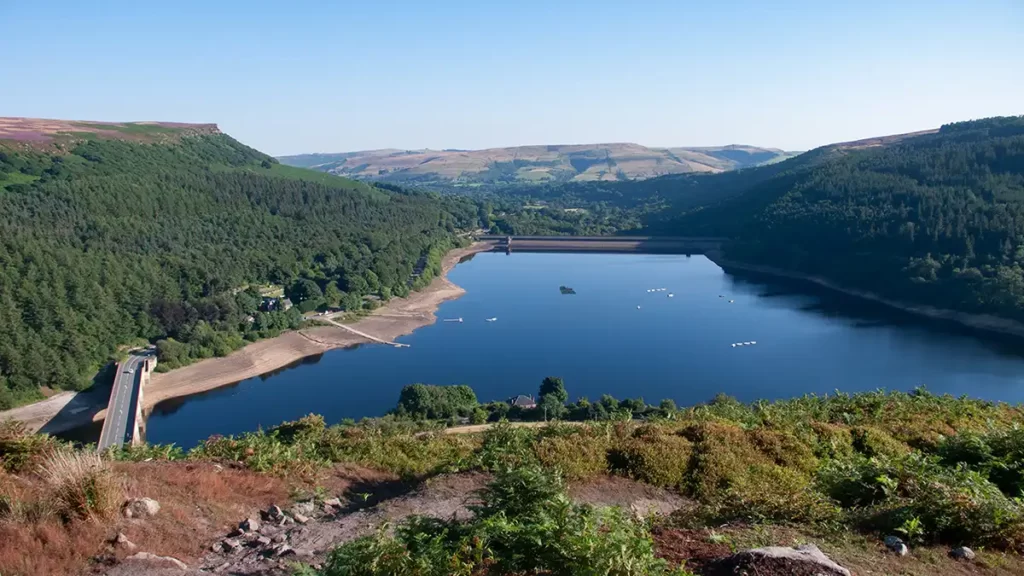
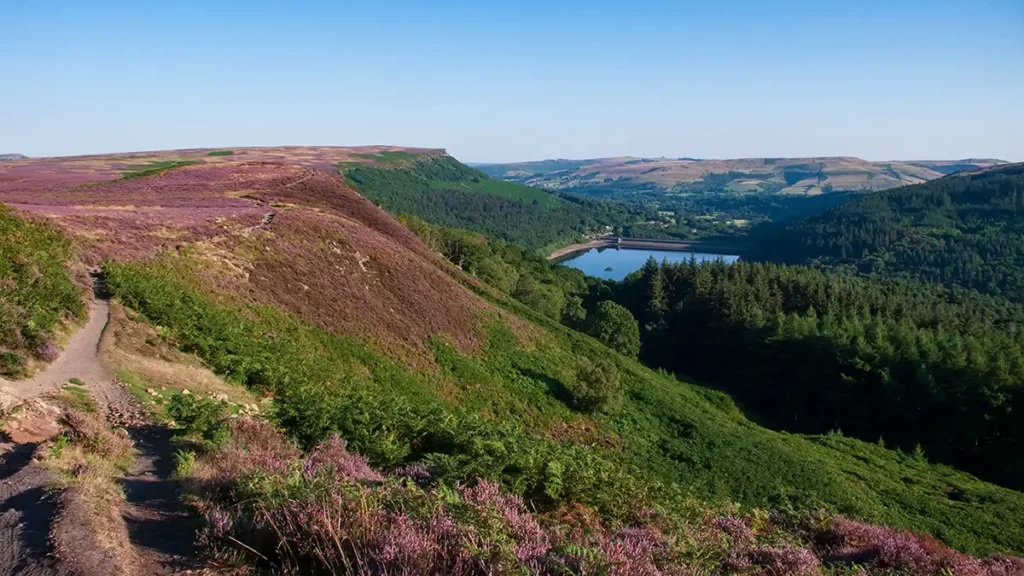
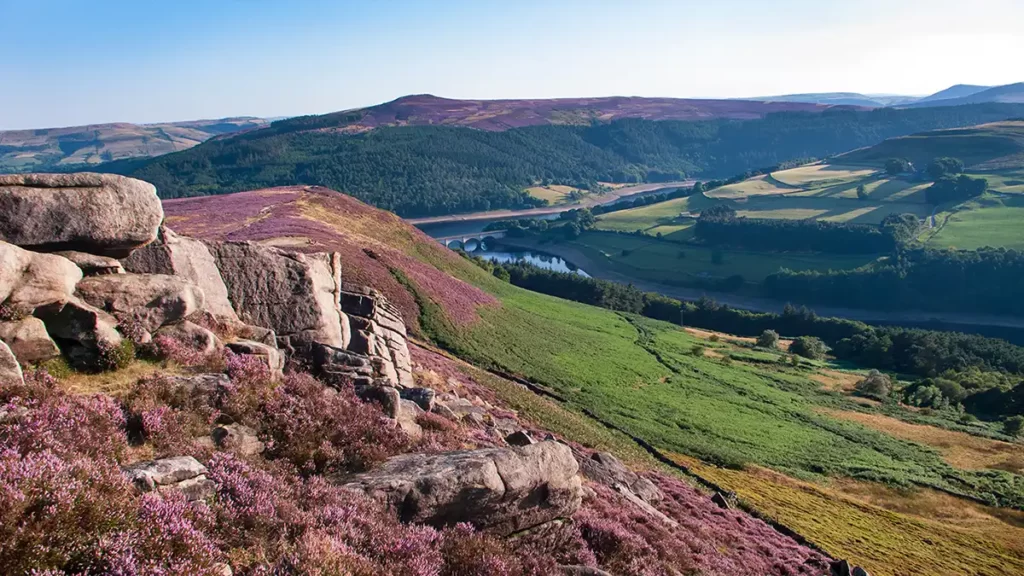
This Ladybower Tor walk takes paths which are not as busy as those below, beside the reservoir. The route climbs above Ashopton & the Upper Derwent Valley, climbing Ladybower Tor, along to Lead Hill then Whinstone Lee Tor. Enjoy sunning views of Ladybower reservoir before crossing the lower end of the Derwent Moors. Finally drop back down to Ashopton through the Ladybower Wood nature reserve
Ladybower Tor Walk Overview
Distance: 4.5 Miles (7.2km)
Total Ascent: 879ft / 268m
Time: 2 hr 20min
Map: Ordnance Survey OL1 (The Peak District – Dark Peak Area)
Get this route on the OS maps website & app
The time is loosely based on Naismith’s Rule and will vary depending on the walker.
Getting There
By Car:
Parking on the A57 before Ashopton Viaduct (Parking on the left if heading west away from Sheffield, after the traffic light controlled junction with the A6013 road to Bamford
Public Transport:
Bus Service 258 Sheffield – Bakewell service stops at the Ladybower Inn, about 1/4 mile from the start of the walk. From the bus stop head west, past the traffic light junction to reach the Ashopton Viaduct.
Ashopton to Ladybower Tor
From your parking spot, head west alongside the A57 towards the Ashopton Viaduct. As the footpath/cycle path ends and heads across the road, cross over and walk up the tarmac drive by the bus stop, towards a metal gate.
Turn right before the gate, continuing to climb the tarmac drive. Pass Ashopton Cottage on your right, then pass left of Dale Cottage. Head up the gravel track ahead, through a gate after Ding Bank Farm. Keep straight ahead after a wooden electricity pole and through the gate signed ‘Cutthroat Bridge’
After approximately 40 metres, before reaching another electricity pole, the path forks. Take the left path. This narrower path climbs steeply at first through bracken, roughly following the line of the power lines initially before it eases away to the left. Views soon open up of Ladybower and the dam at Yorkshire Bridge to your right.
As you draw almost level with the road bridge below to your right, follow the path as it turns left and continues to climb Ladybower Tor.
Where the path forks, with both paths bearling slightly right, take the leftmost option for an easier ascent Continue ascending as the 2 paths rejoin higher up, zig-zagging then heading north-west to the top of Ladybower Tor.
Ladybower Tor to Whinstone Lee Tor
To your left, you can now look over the start of the Upper Derwent Valley below the twin peaks of Crook Hill opposite. Farther away and slightly to the left lies Lose Hill. Closer to you, over the reservoir, the pimple of Win Hill Pike.
Continue northwest along the top of Lead Hill, following the clear path
Along Lead Hill, the path follows the edge as it turns the left then to the right, heading towards Whinstone Lee Tor ahead.

At a path crossroads, continue straight ahead toward the top of Whinstone Lee Tor. As you ascend, bear slightly left up the stepped boulders. Walk to the edge on your left to take in classic views over Ladybower and the Upper Derwent Valley
Whinstone Lee Tor to Cutthroat Bridge
When you have finished drinking in the view over the valley, head back down Whinstone Lee Tor to the path crossroads. Turn left, signposted ‘Cutthroat Bridge’.
The easy-to-follow path heads east for approximately 1 mile, heading east across Derwent Moor, then turns right beside a brook towards Cutthroat Bridge.
The eerily named Cutthroat bridge has a very fitting name, the history of Cutthroat Bridge involves two murders, one ancient and one modern.
Cutthroat Bridge to Ladybower Wood
After the path turns right beside the brook of Highshaw Clough, reach a fork just before power lines. Bear right, climbing up a little and heading southwest with the power lines running roughly parallel to you on the right.
Continue along this wide clear track with the distinctive shape of Win Hill in the distance ahead.

As the track and the power lines converge, the path dips right, through a gate and fords a small stream as it enters Ladybower Wood.
Ladybower Wood to Ashopton

The path continues to be obvious and easy to follow as it passes through Ladybower Wood. At a path junction, if you wish, you can head right to explore the nature reserve before continuing along the path.
Eventually, the path becomes more uneven and drops downhill, heading slightly right beside a stone wall. Follow this rocky path down through a gate and continue along the obvious track, now with a stone wall to your right. At the end of the stone wall, the path forks directly under the power lines.
If you used public transport to reach this walk, at this point you can fork left if preferred, to leave the route for a shortcut down to the Ladybower Inn and bus stop.
Bear right at the path fork, walking through the trees and passing behind Ladybower Inn below left. The path climbs to the right and then levels out beside a stone wall on your left. Pass through a gate; the path bears left and climbs again before views open up of Ladybower and the Bamford Road bridge now to your left.
Continue uphill, passing a short section of wooden fencing which fills a gap between two sections of the drystone wall. At the next path, fork, keep left to stay alongside the wall.
The descending path eventually passes the path on your right which you took close to the start of the walk when heading up Ladybower Tor. Continue straight ahead, heading gently downhill and retrace your steps through the gate, following the track and tarmac drive back to the main A75 road and the start.